Integrated Development Environment (PyCharm)
JetBrains PyCharm is a suitable IDE for the Python assignments. The Community Edition is free and sufficient for this course.
Install PyCharm by following the official guide: PyCharm Installation Instructions
Note
The screenshots below are from Windows. On macOS the menu path is typically PyCharm > Settings instead of File > Settings.
Prerequisites
Before you start in PyCharm, make sure you have:
downloaded or cloned the repository
cas-assignmentcreated the conda environment called
cas(as described in Python Installation)
Open the assignment as a PyCharm project
Start PyCharm.
Click Open (or File > Open).
Select the folder
cas-assignment(the repository root), then confirm.
Configure the Python interpreter (conda environment cas)
PyCharm must use the conda environment cas to find the required libraries.
Open the settings:
Windows/Linux: File > Settings…
macOS: PyCharm > Settings…

In the left sidebar, go to Python > Interpreter.
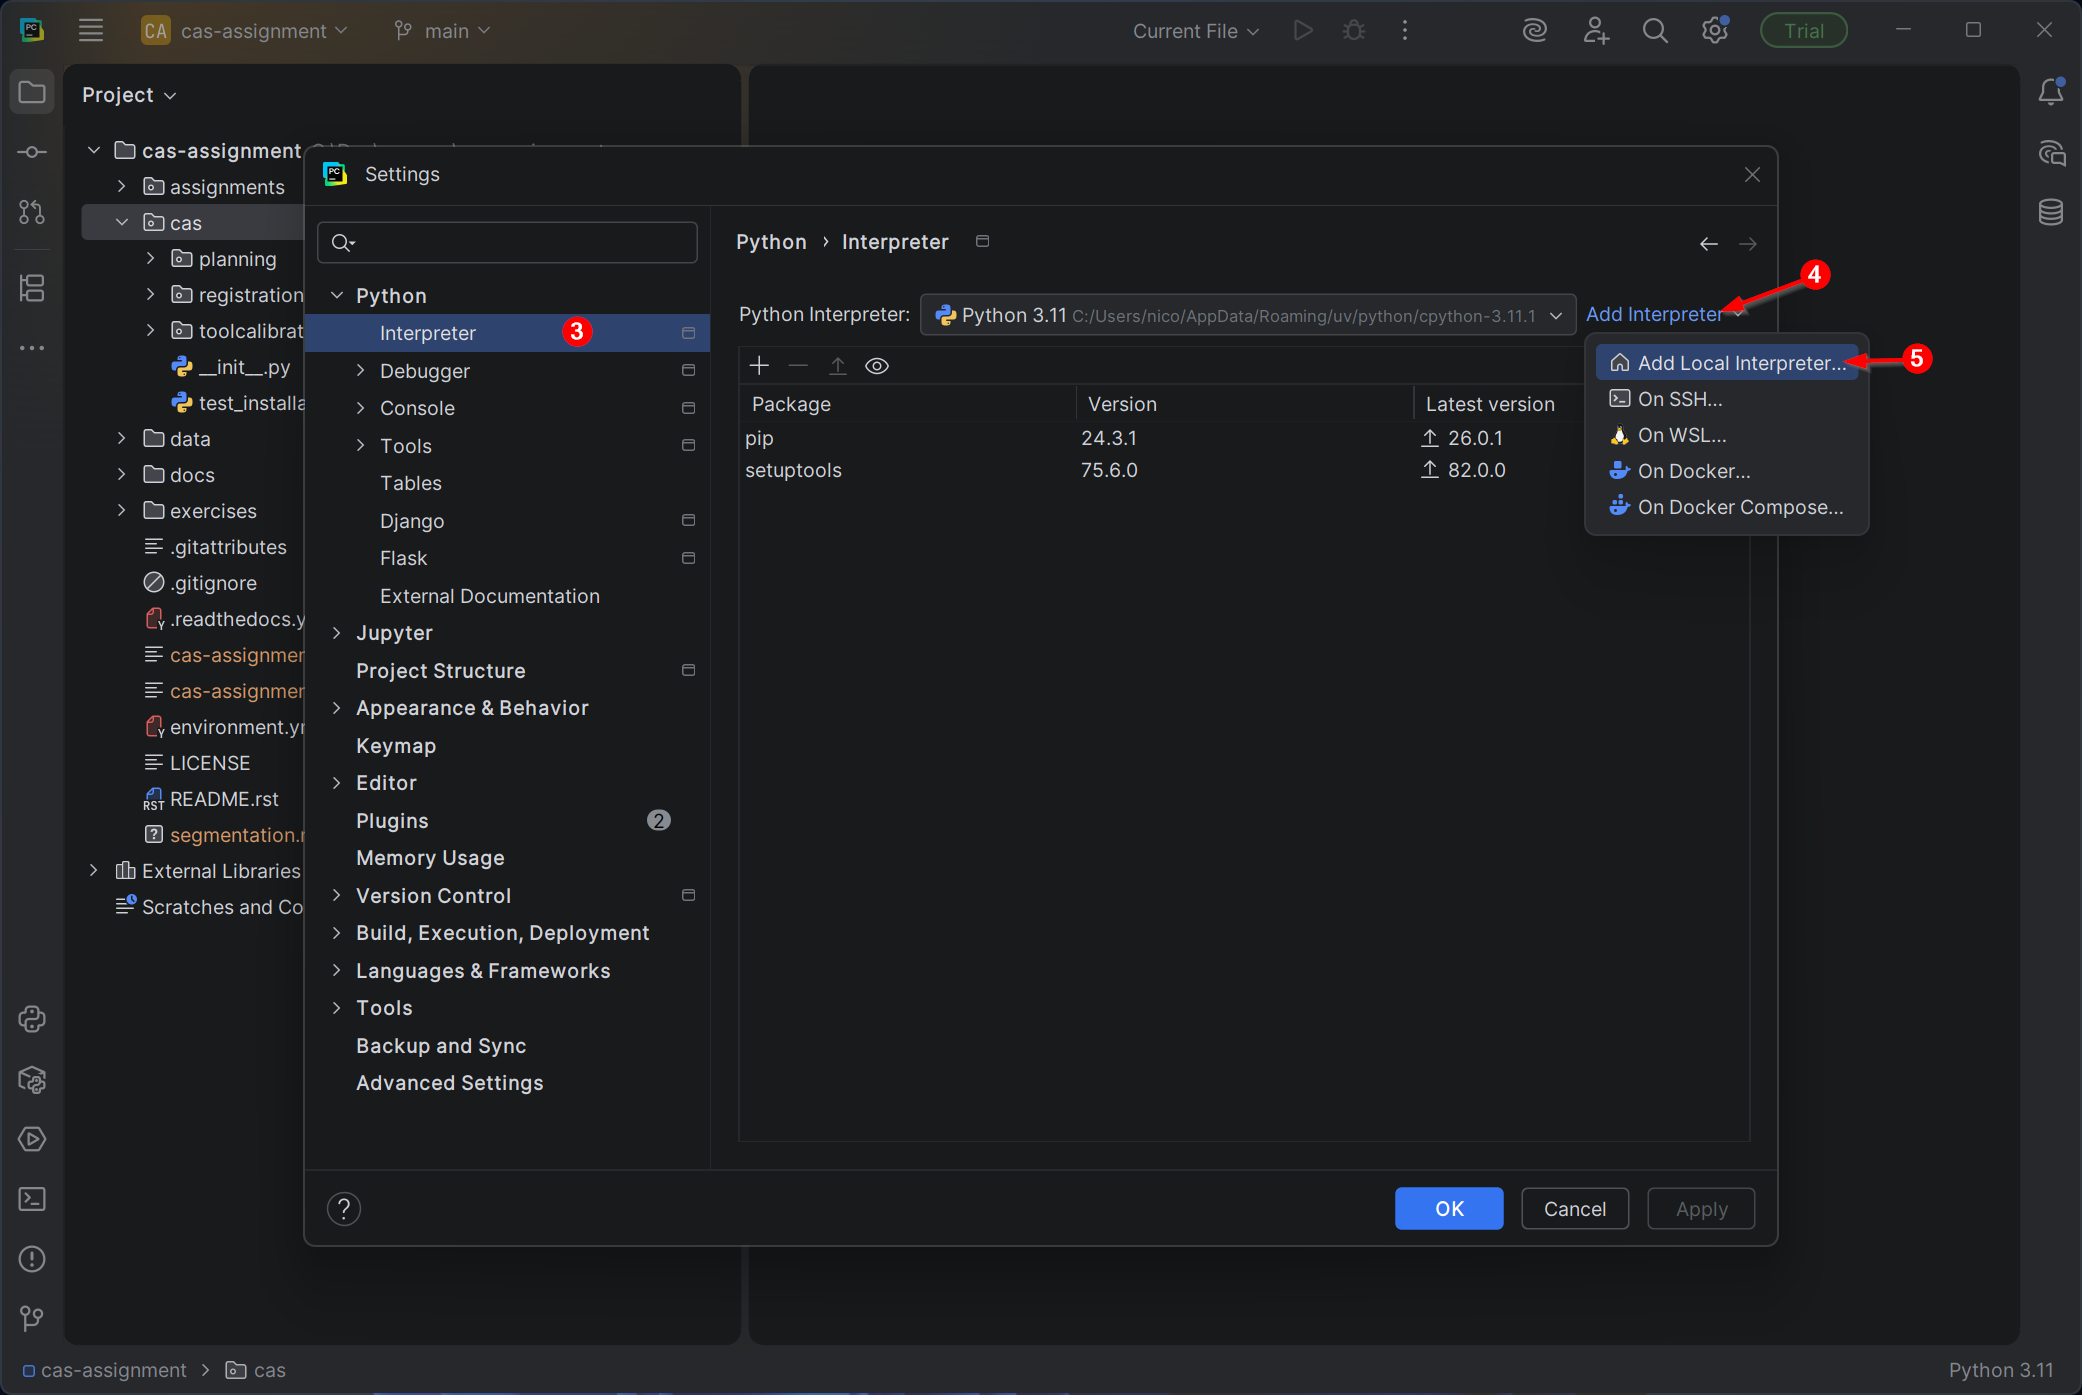
If
casis already available in the interpreter dropdown, select it. Otherwise add it:click Add Interpreter
choose Add Local Interpreter…
In Add Python Interpreter:
select Select existing
set Type to Conda
set Environment to your
casenvironment folder, for example:Windows:
C:\Users\<username>\miniconda3\envs\casLinux/macOS:
/home/<username>/miniconda3/envs/cas
click OK

Back in Python > Interpreter, confirm that:
the selected interpreter points to
.../envs/cas/...you see many installed packages in the list
Then click OK to close the settings.

Create a run configuration (recommended)
Create one run configuration that always uses the cas interpreter and runs
the currently opened file. This avoids accidentally running code with the wrong
Python environment.
Open
cas/test_installation.py(Project view on the left).Open the run configuration dialog:
In the top bar, open the configuration dropdown (often shows Current File)
Click Edit Configurations…
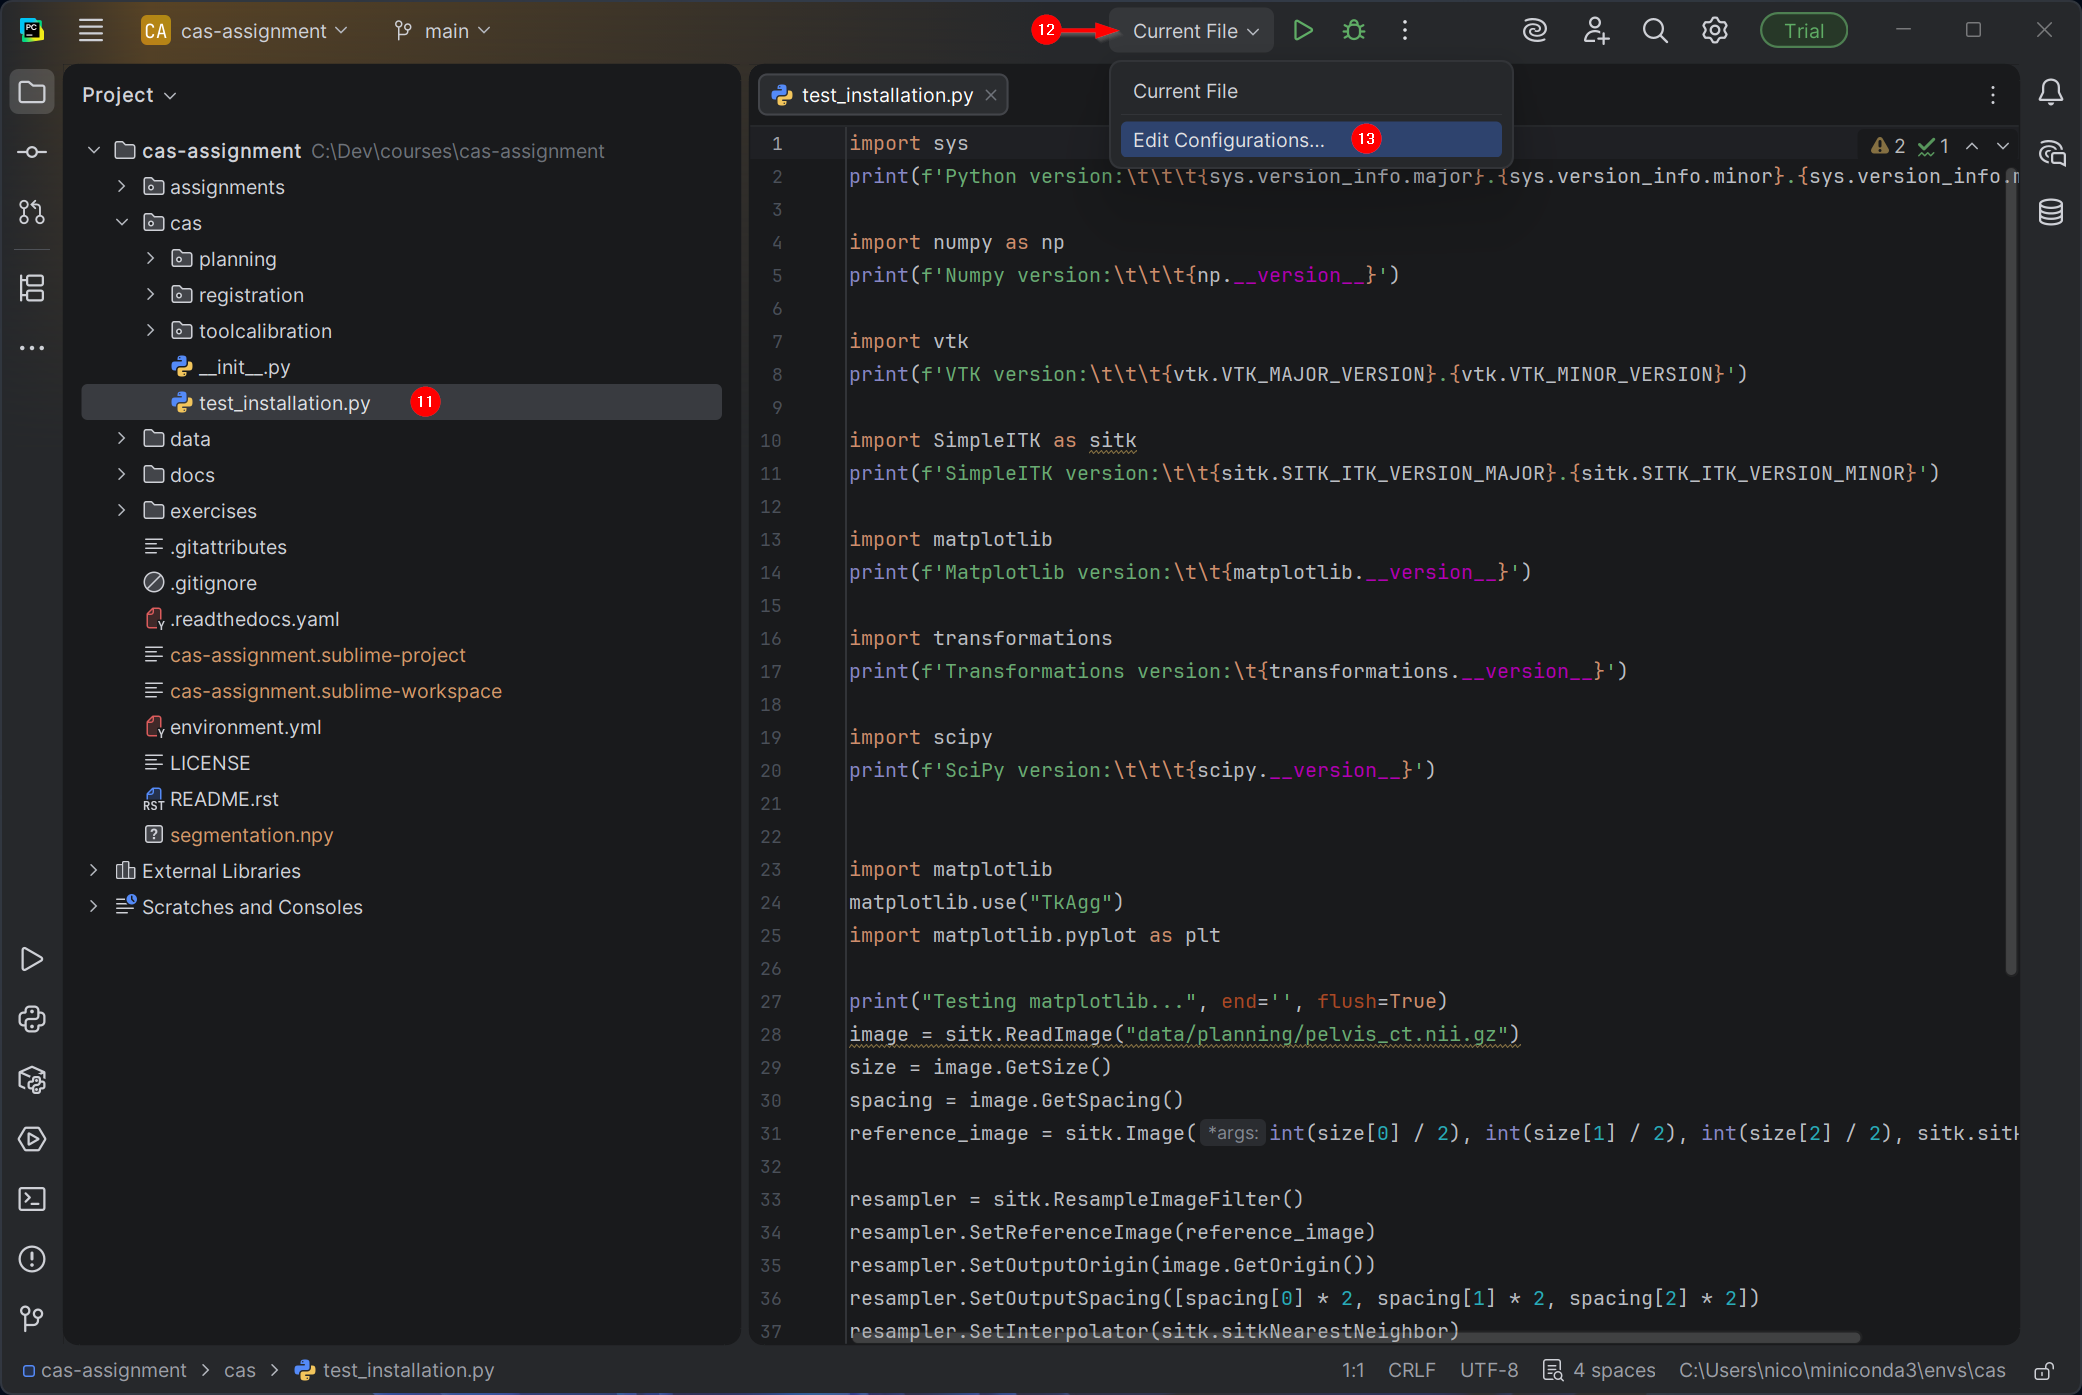
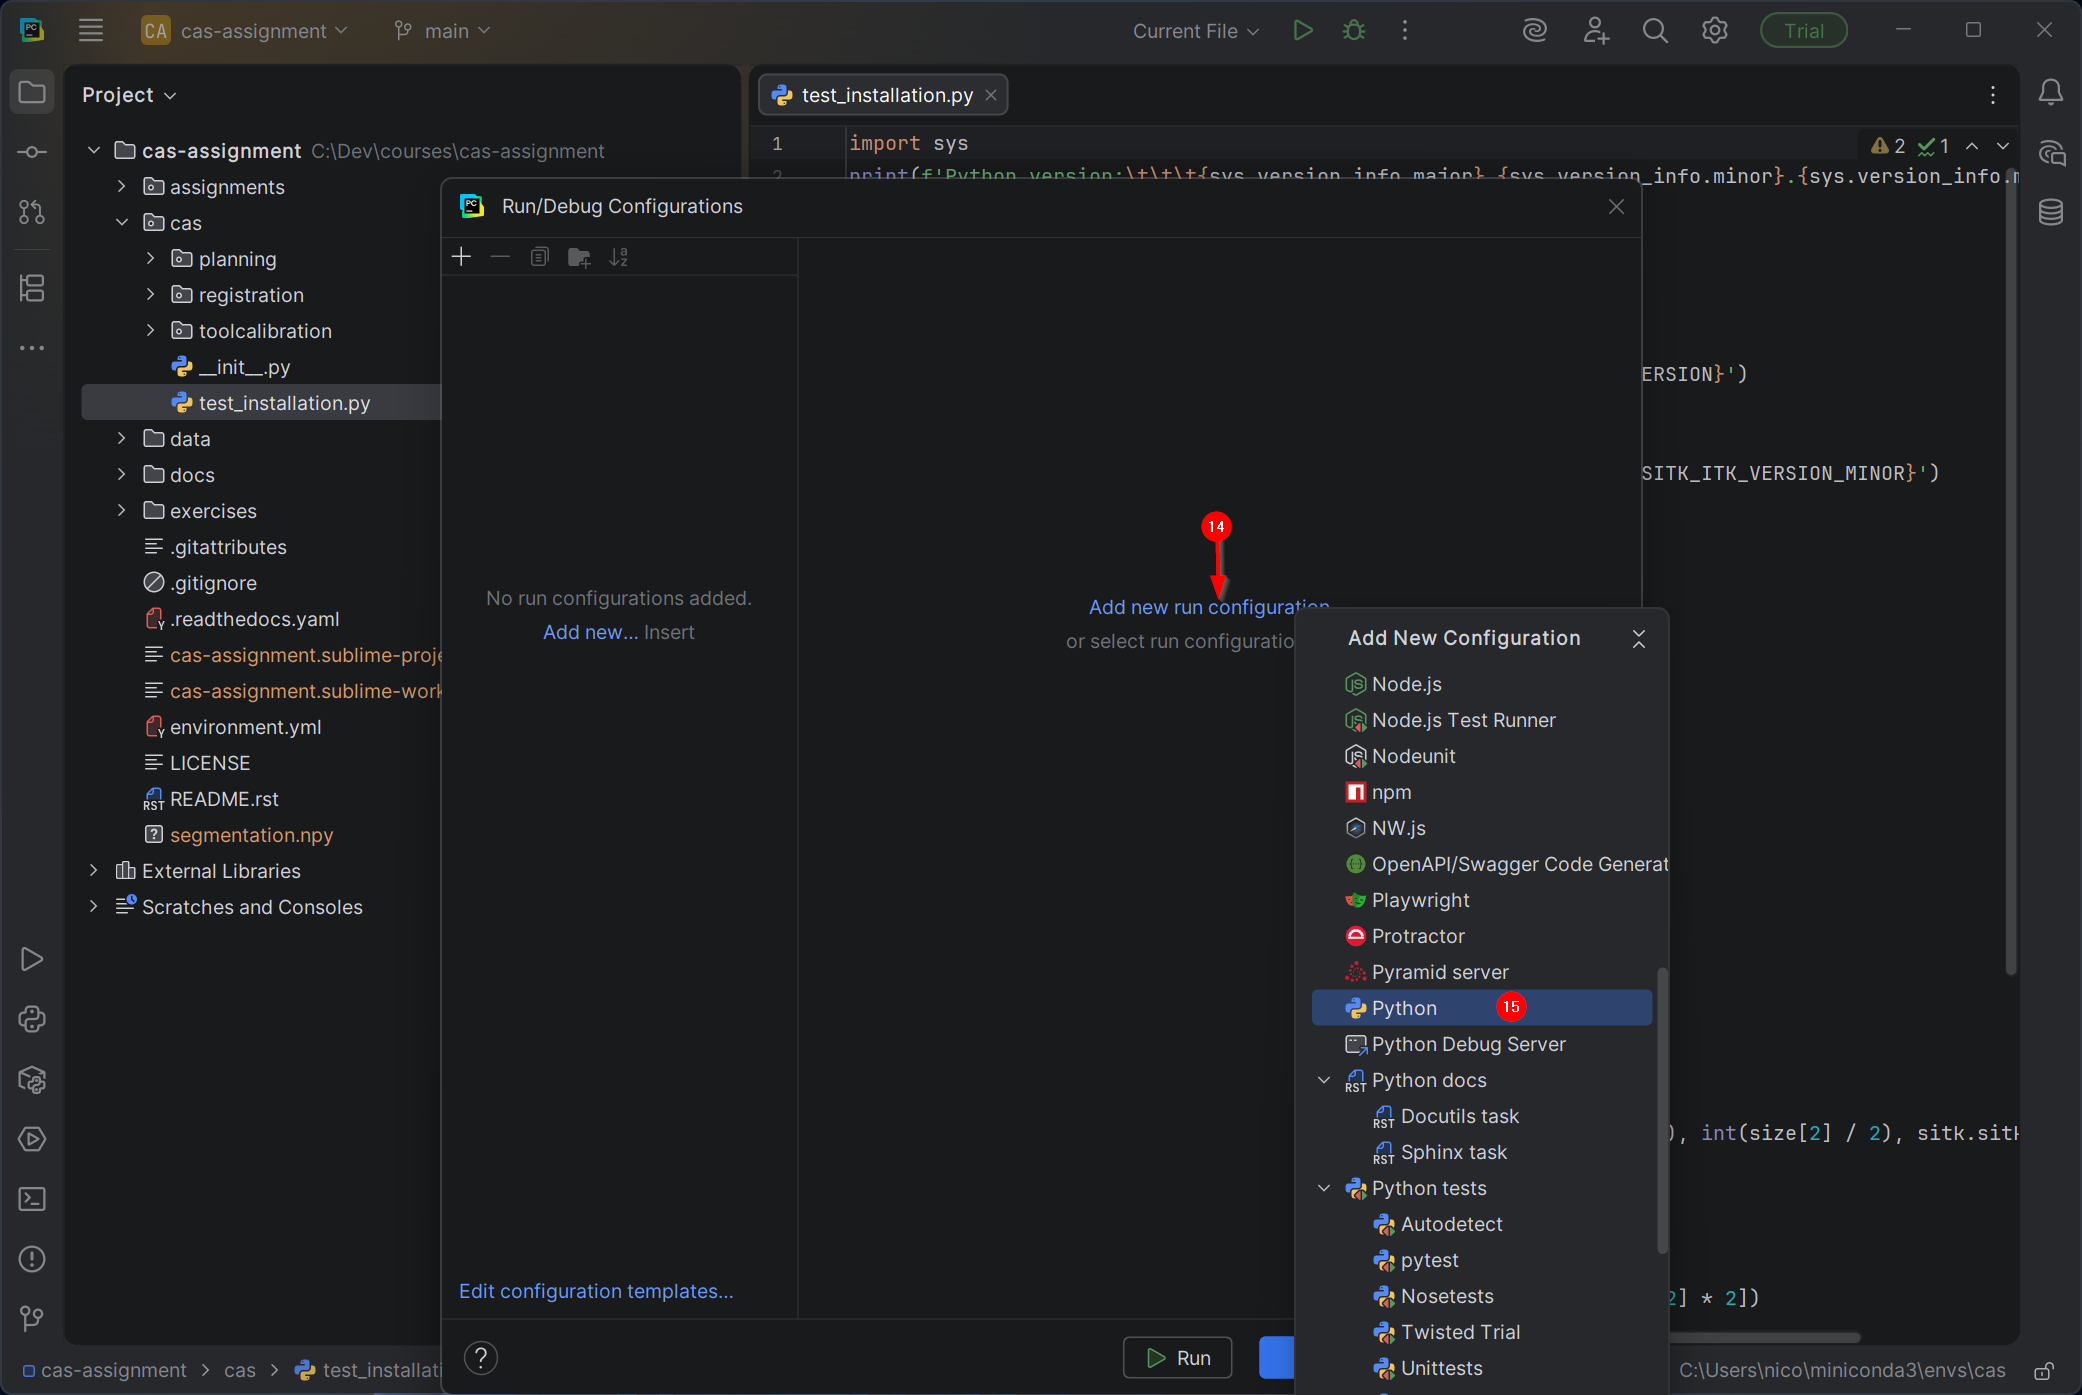
Create a new configuration:
Click Add new run configuration…
Select Python
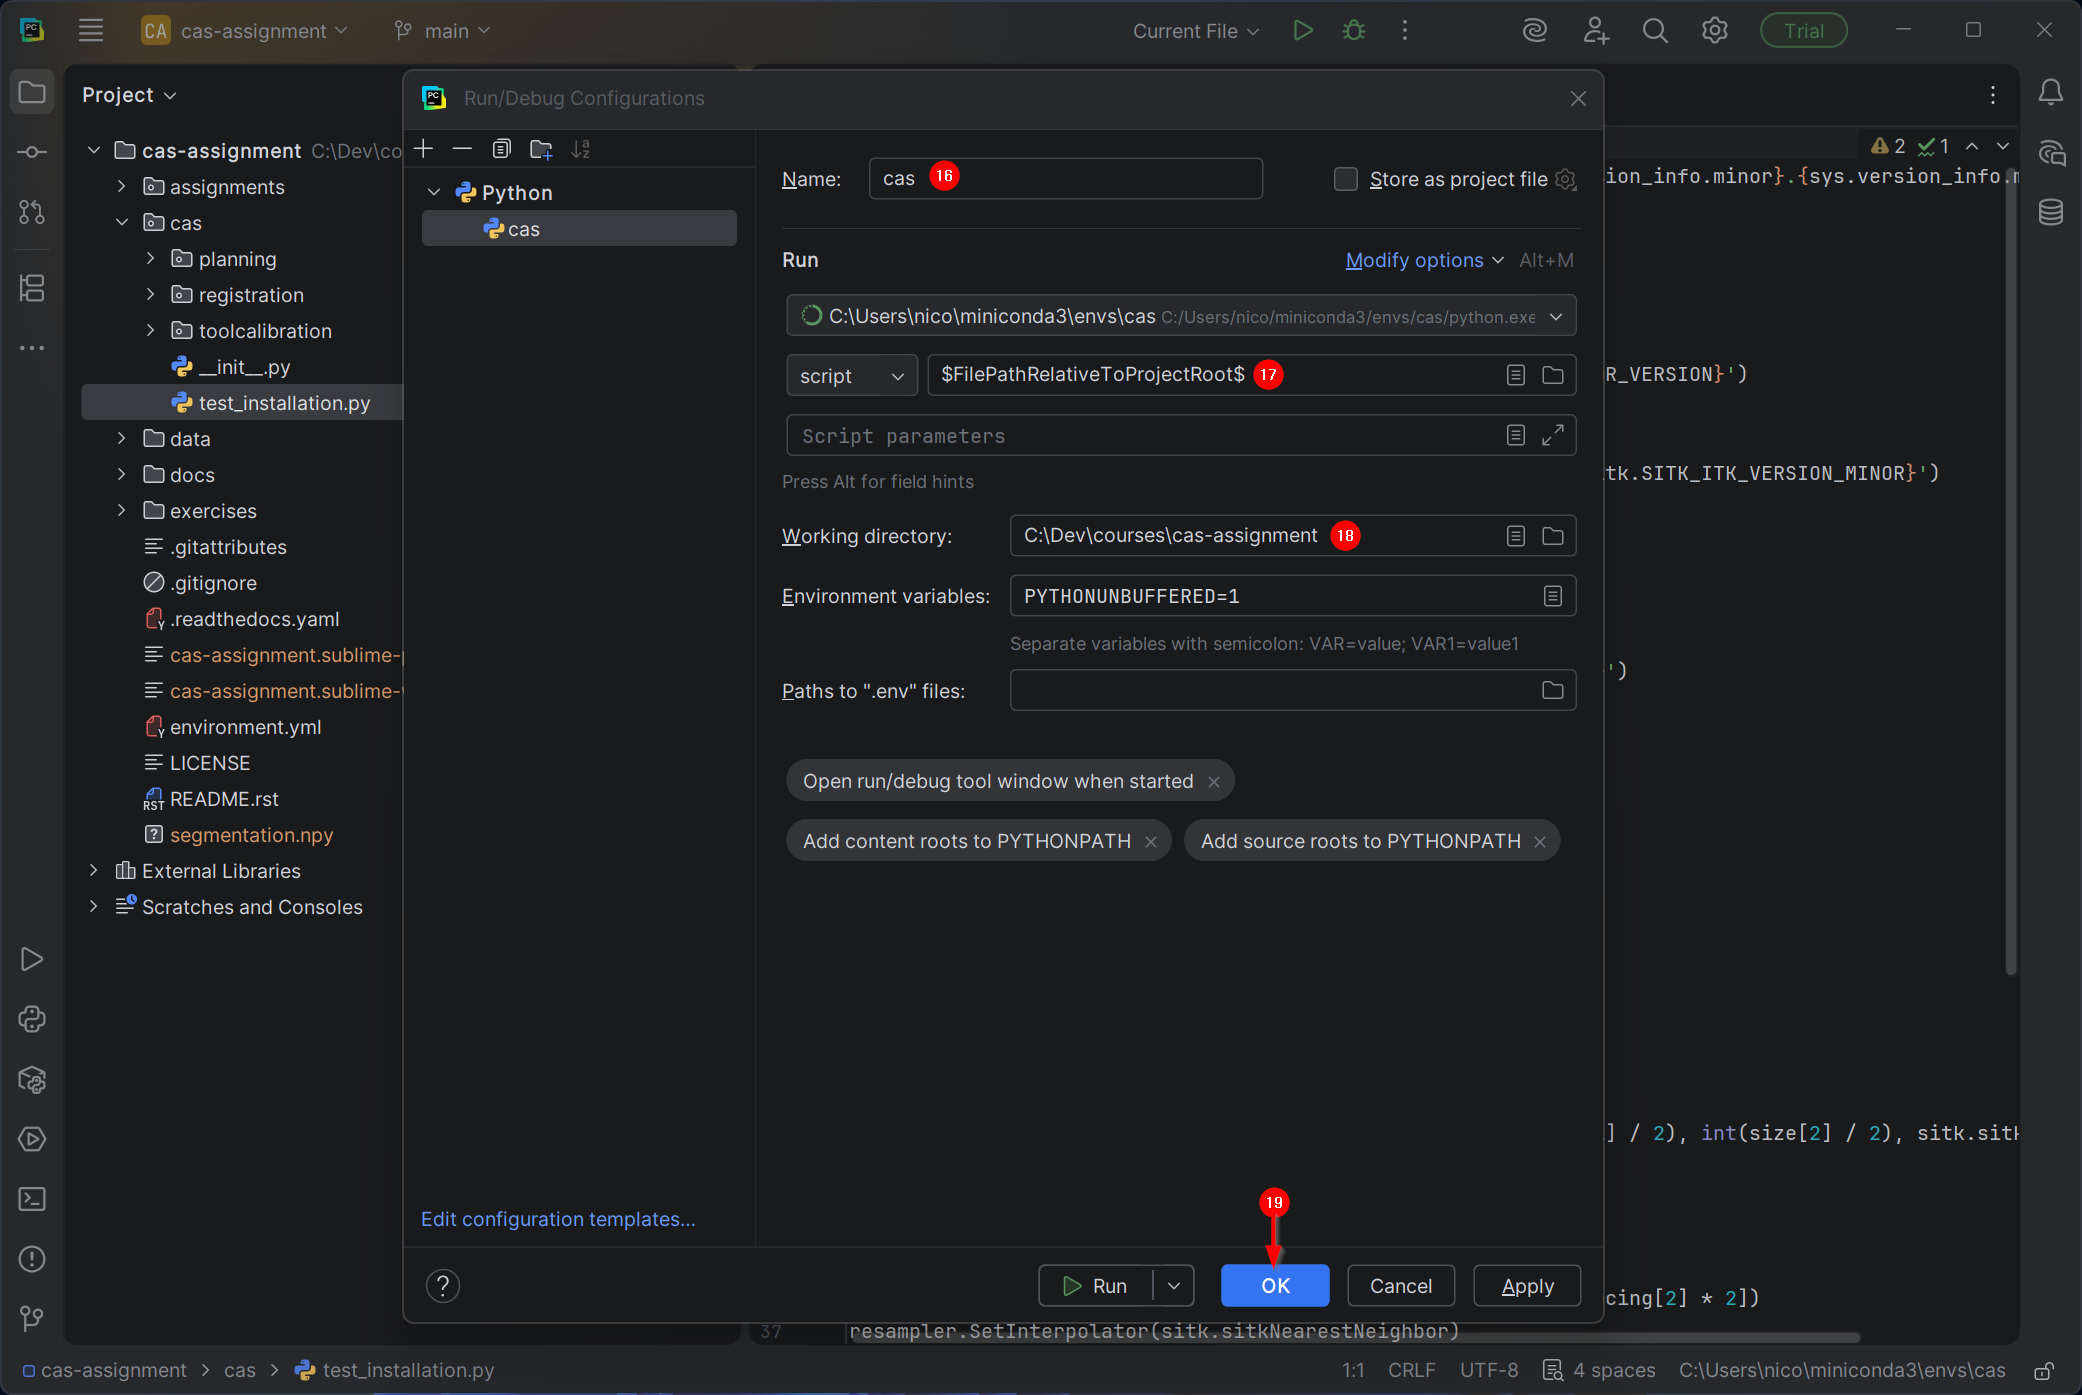
Define the configuration:
Name:
casInterpreter: select your conda environment
casscript:
$FilePathRelativeToProjectRoot$(this runs whichever file is currently open)Working directory:
</path/to/cas-assignment>
Click OK.
Verify your setup in PyCharm
Make sure the run configuration
casis selected in the top bar.With
cas/test_installation.pyopen, click the green Run button.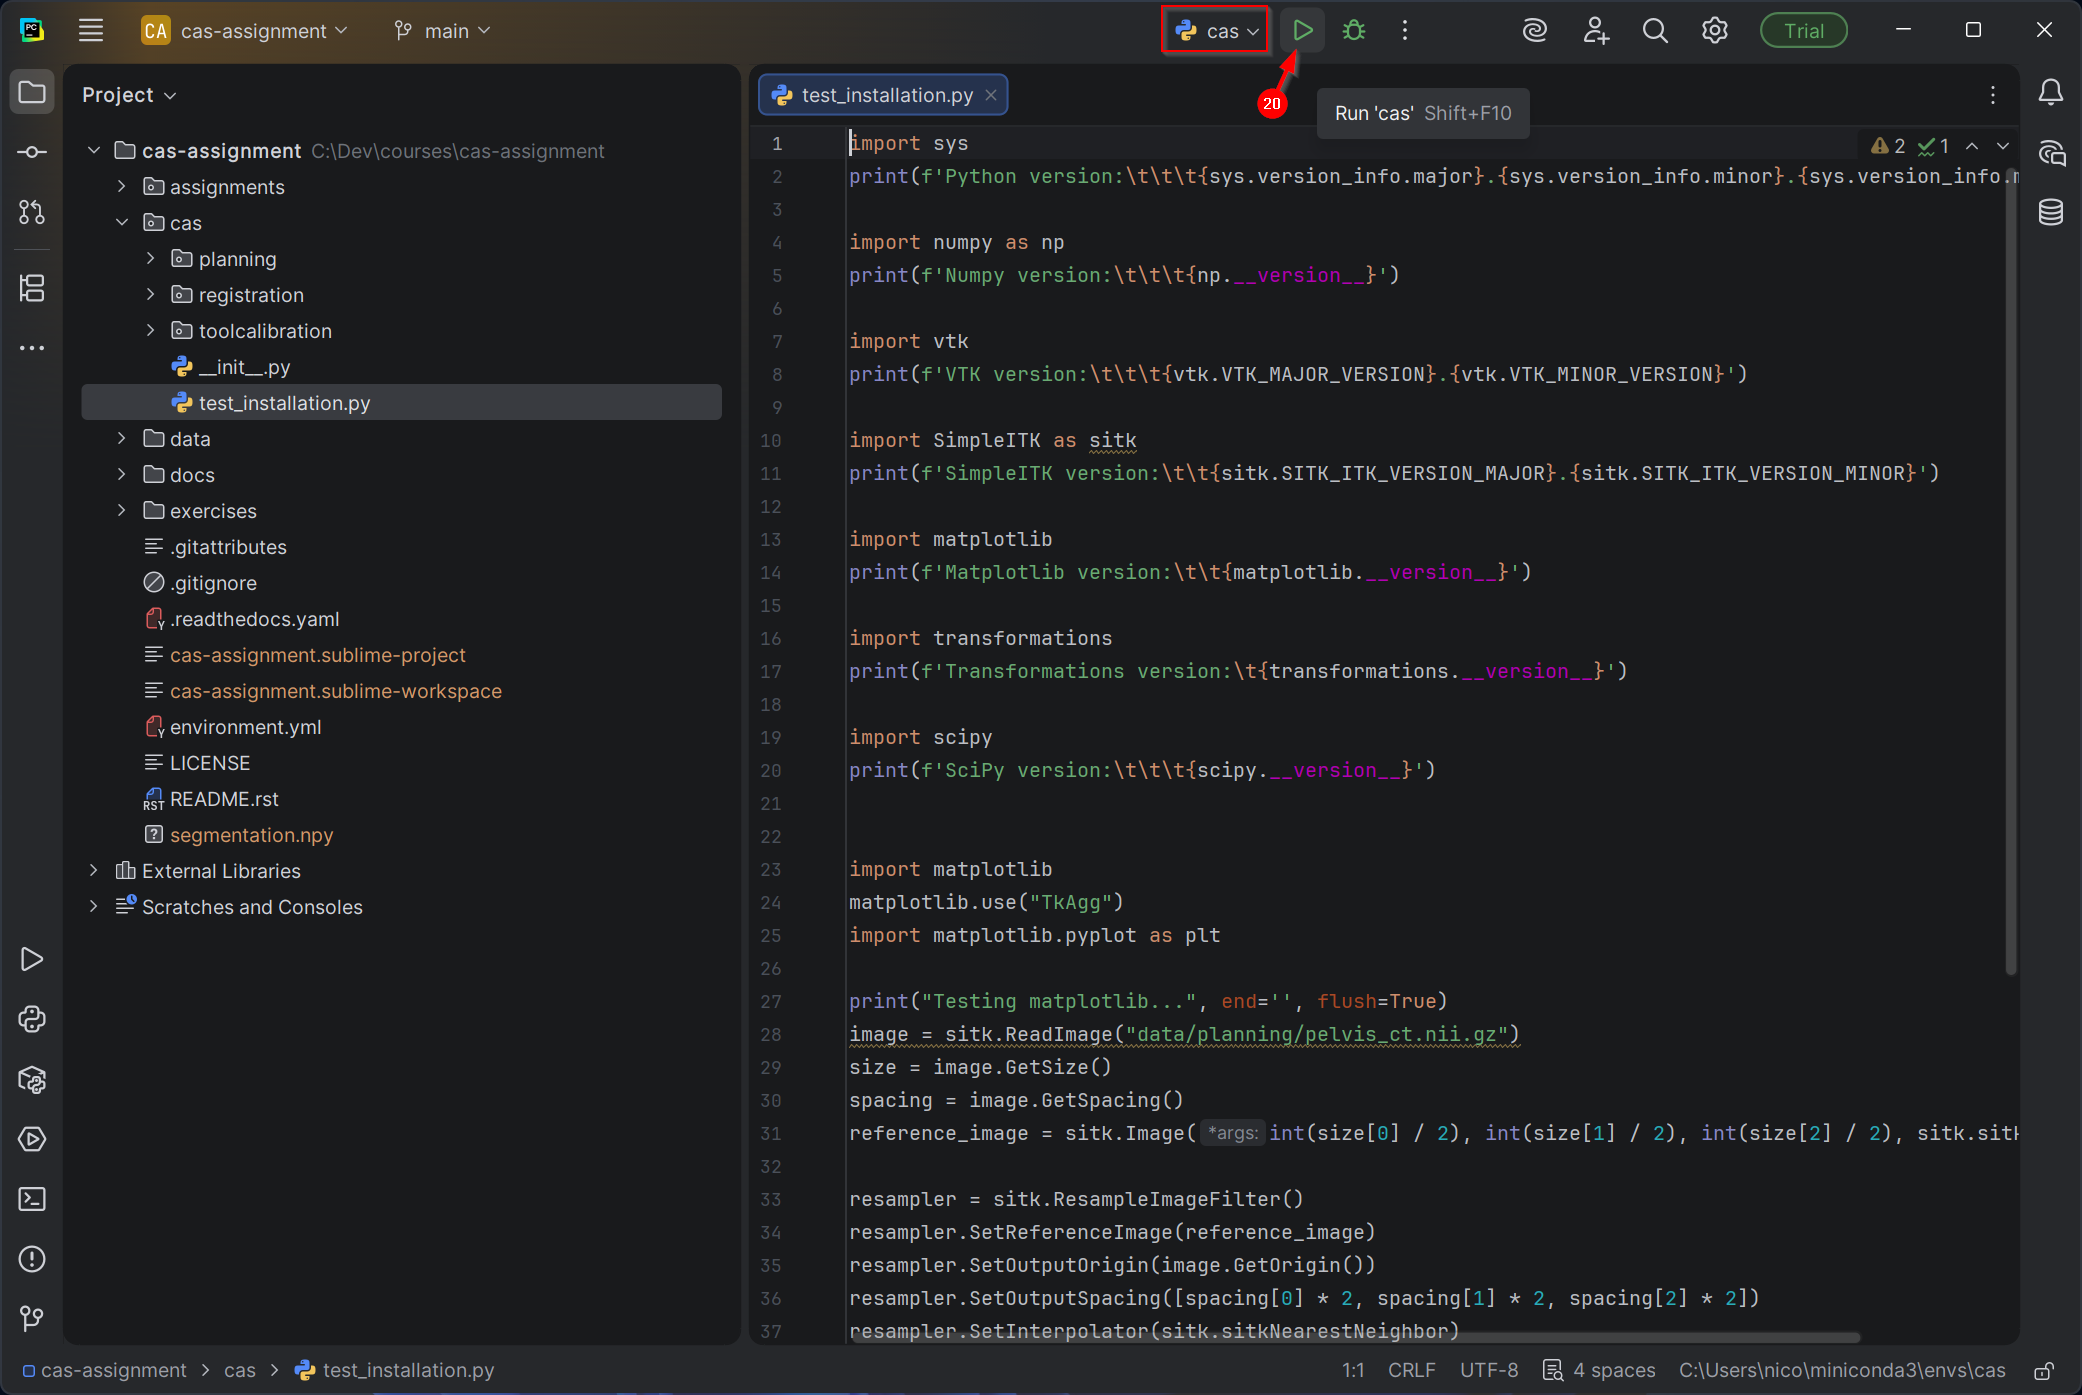
Note
The installation test requires the file data/planning/pelvis_ct.nii.gz.
If it is missing, cas/test_installation.py will stop and print
instructions on where to place the file.
Download and copy the file by following Assignment Environment Setup.
Important
Before running any assignment code, make sure the cas run configuration
is selected. Otherwise PyCharm may run using a different interpreter.
Troubleshooting (most common issues)
ImportError / ModuleNotFoundError Verify that Python > Interpreter points to
envs/casand that the run configuration uses the same interpreter.File not found (relative paths to data) Verify that the run configuration Working directory is set to the repository root
cas-assignment.